7.3 Managing GlobalPlatform keys
Warning: You cannot change the keys that you save using the Manage GlobalPlatform Keys workflow.
Warning: If new keys are imported to or generated on the HSM during this workflow, you should take a new backup of the HSM. Keys stored on the HSM are business critical data.
The Manage GlobalPlatform Keys workflow contains two pages – one for entering details of Customer keys and the other for Factory keys.
Note: You must complete and save the information for one keyset before re-entering the workflow to record information for the other keyset.
- Factory keys: you can enter multiple sets of factory keys, identified by the names you give them. Factory keys can be deleted but not modified.
- Customer keys: you can only enter a single set of customer keys at a time per Key Algorithm. You can delete old keys and add a new set; cards issued with the previous customer keys will still work, but all cards issued in the future will use the new customer key.
Intercede recommends you use HSM generated diverse customer keys for security. You can use any diversification algorithm for your customer keys; the diversification algorithm does not need to match the one used for the factory keys.
You can use diverse customer keys even if the factory keys are static.
The Key Algorithm must match the secure channel used for the factory keys. If you are issuing multiple types of GlobalPlatform cards (or SIMs or other form factors) using secure channel types associated with different key algorithms, you need to configure multiple Customer GlobalPlatform keys. For example, you will need to configure 2DES GP customer key for those using the SCP01 channel type, and an AES128 for those using the OT-SCP03 channel type.
|
Secure Channel Type |
Key Algorithm |
|---|---|
|
SCP01/SCP02 |
2DES |
|
OT-SCP03 |
AES128 |
|
SCP03 |
AES128/AES192/AES256 (depends on card type) |
Note: If you are evaluating or testing MyID, you may choose to use the provided factory keys only. You can return to this workflow and add customer keys later.
Note: The HSM options in the Manage GlobalPlatform Keys workflow are available only if you selected an HSM (in GenMaster) to store your MyID database keys. See the Using GenMaster section in the Installation and Configuration Guide for details.
7.3.1 Entering factory (vendor) keys
-
From the Applets category, select Manage GlobalPlatform Keys.
You can also launch this workflow from the Configuration Settings section of the More category in the MyID Operator Client. See the Using Configuration Settings workflows section in the MyID Operator Client guide for details.
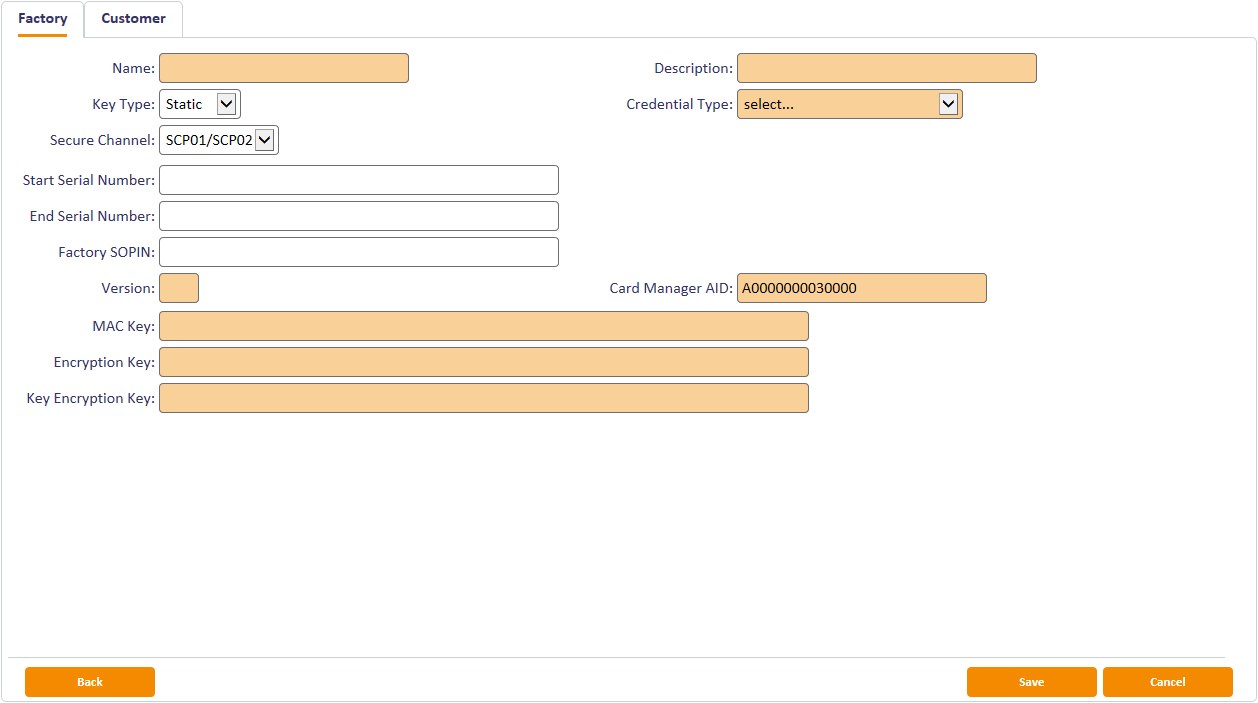
- The Factory page is displayed.

- Note: You can define multiple sets of factory keys – if one already exists, click New to create a new set. If multiple factory keys are defined for the same credential, the most recently entered factory key will take precedence.
- Type a Name and a Description for the key set.
-
- Static – the key used is the same throughout.
- Diverse – the keys use a diversification algorithm.
Different options appear based on your choice of Key Type.
- In Credential Type, select the type of card that you are using. The contents of this list are based on the choices made when MyID was installed. The factory key you are entering will only apply to this credential type.
-
In Secure Channel, select the secure channel used to communicate with the cards.
See the Smart Card Integration Guide for details of which secure channel your cards use.
-
You can optionally specify a range of card serial numbers in Start Serial Number and End Serial Number.
- The length of the Start Serial Number and End Serial Number must be the same – and are both set at a maximum of 50 characters (although they will normally be shorter).
- The numbers in Start Serial Number and End Serial Number define an inclusive range (they are the lowest and highest permitted numbers).
If you specify a serial number range, you can define multiple factory GlobalPlatform keys for the same credential type, each applying to different serial number ranges.
If you do not specify a range, the keys you enter will be used for all cards of the specified type.
-
Type the default factory SOPIN in the Factory SOPIN field.
Entering the factory SOPIN is optional – if not specified, the default SOPIN configured in the system for the credential type is used.
-
Enter a Version for the key set.
This version number should be available from your card manufacturer and will be a number between 0 and 127 or 255. A version of 255 should normally be used for cards delivered with an Initial Keyset.
-
Enter the value provided by the card vendor in Card Manager AID. This is the application identifier for the GlobalPlatform Card Manager applet.
Note: Take care when entering the AID. Some cards have very similar (but different) values.
-
If you selected Static keys, type the provided MAC Key, Encryption Key and Key Encryption Key values into the fields.
- The MAC Key is the Secure Channel Message Authentication Code Key (S‑MAC).
- The Encryption Key is the Secure Channel Encryption Key (SENC).
- The Key Encryption Key is the Data Encryption Key (DEK).
-
If you selected Diverse keys:
-
Select the Diversification Algorithm from the list available.
The algorithm depends on the cards you are using. For example, GemPlus PIV cards use Diverse1, while Oberthur PIV cards use Diverse3.
Note: You have to obtain this information from the card vendor.
-
Select one of the following options:
- Master Key – type the key into the Master Key field. Optionally, you can include the Key Checksum Value.
- HSM Label – type the label of an existing HSM‑resident master key into the HSM Label field.
- Use Key Ceremony – once you click Save, you enter the parts of the transport key and encrypted master key in a key ceremony.
- Import Keys from File – once you click Save, you import the key from an XMLenc format file.
-
-
If you are using a key ceremony or importing keys from file, you can specify the attributes of the key. These determine the possible uses of the key.
- Data Encryption Key – the key is used to encrypt data.
- Allow Signing Operations – the key can be used for signing operations.
- Exportable – the key can be exported after it has been imported. See section 7.3.4, Exporting keys for details.
- Key Encryption Key – the key can be used to encrypt keys.
- Allow Derivation – the key can be used to derive individual keys.
Note: The keys entered must match the keys on the cards you intend to use – attempting to authenticate to a card with incorrect keys will eventually cause the card to lock permanently.
Note: If you need help in deciding which attributes to use, contact Intercede customer support quoting reference SUP-96.
- Click Save.
- If you are using the Use Key Ceremony or Import Keys from File options, you must now provide the keys. See section 7.3.2, Using a key ceremony or section 7.3.3, Importing keys from a file.
7.3.2 Using a key ceremony
-
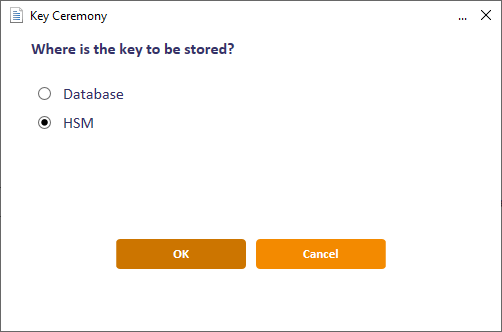
If you have installed support for an HSM, you are asked whether you want to store the key in the database or on the HSM.
Note: Intercede recommends using an HSM if one is available as this offers additional protection to the keys.

-
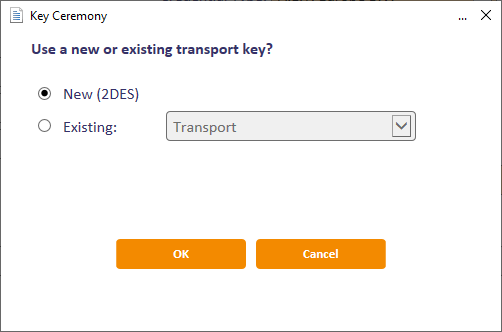
If you have previously stored a transport key using the Key Manager workflow, you can select this key from the Existing list, or select New to enter a new key.

See section 16.2, The Key Manager workflow for details of storing a transport key using the Key Manager workflow.
-
If you are using a new transport key, in the Key Ceremony dialog, enter the first part of the transport key.

You can optionally enter the Check Value to ensure that you have entered the transport key fragment correctly. Check values are usually provided for each fragment by your card vendor.
If you are using a new transport key, it must be the same type as the new master key. The key type is displayed in the Key Ceremony dialog; for example, (2DES).
- Click OK, then enter the second and third parts of the transport key.
-
Enter the encrypted master key.
You can optionally enter the Check Value to ensure that you have entered the encrypted master key correctly.
If you are using an RSA transport key, you must also select the Padding Type that was used to export and encrypt the key. See section 16.3, Using RSA transport keys for details.
- Click OK.

7.3.3 Importing keys from a file
If you chose to import keys from a file:
-
Select the Key Information File in the file dialog.
The file must be in XMLenc format.
The file must contain information on the transport key used to encrypt the file; the system checks the contents of the <ds:KeyName> node in the XML import file against the names of the transport keys in the database, and against the Key Check Values (KCVs) of the keys' contents. If it finds a match against either the name or the KCV, it decrypts the key from the XML file.
- Click Open.
The key is now added to the database or HSM.
7.3.4 Exporting keys
If you have set the key's attributes to allow exporting, you can export a key to an XMLenc format file, encrypted using a transport key. You can use this system to transfer a GlobalPlatform key from one MyID system to another.
-
From the Applets category, select Manage GlobalPlatform Keys.
You can also launch this workflow from the Configuration Settings section of the More category in the MyID Operator Client. See the Using Configuration Settings workflows section in the MyID Operator Client guide for details.
- Select the key you want to export.
-
Click Export.
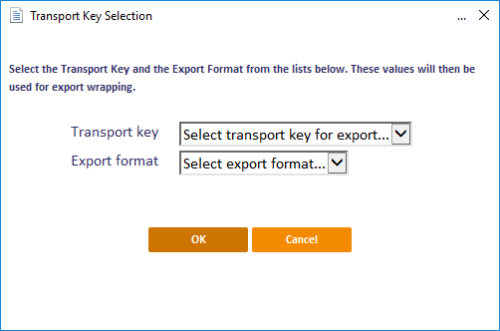
- Select the transport key you want to use to encrypt the key.
-
Select the export format:
- XMLenc – when you click OK, MyID saves the exported key to an XML file.
- KeyCeremony – when you click OK, MyID saves the exported key to a text file containing the key name, type, algorithm, transport key, encrypted key value and the checksum.
-
Click OK, select the file to which you want to export the key, then click Save.
Note: There is a mandatory witness stage for key export. You must have another operator available who has the Witness Key Export permission under Manage GlobalPlatform Keys set up in the Edit Roles workflow.
You can now import this GlobalPlatform key into another MyID system. You must have the same transport key on the target system as on the source system.

7.3.5 Deleting factory (vendor) keys
-
From the Applets category, select Manage GlobalPlatform Keys.
You can also launch this workflow from the Configuration Settings section of the More category in the MyID Operator Client. See the Using Configuration Settings workflows section in the MyID Operator Client guide for details.
- Select the key you want to delete from the Select GlobalPlatform Keys drop-down list.
- Click Delete.
7.3.6 Entering customer (local) keys
-
Select the Applets category and then the Manage GlobalPlatform Keys workflow.
You can also launch this workflow from the Configuration Settings section of the More category in the MyID Operator Client. See the Using Configuration Settings workflows section in the MyID Operator Client guide for details.
-
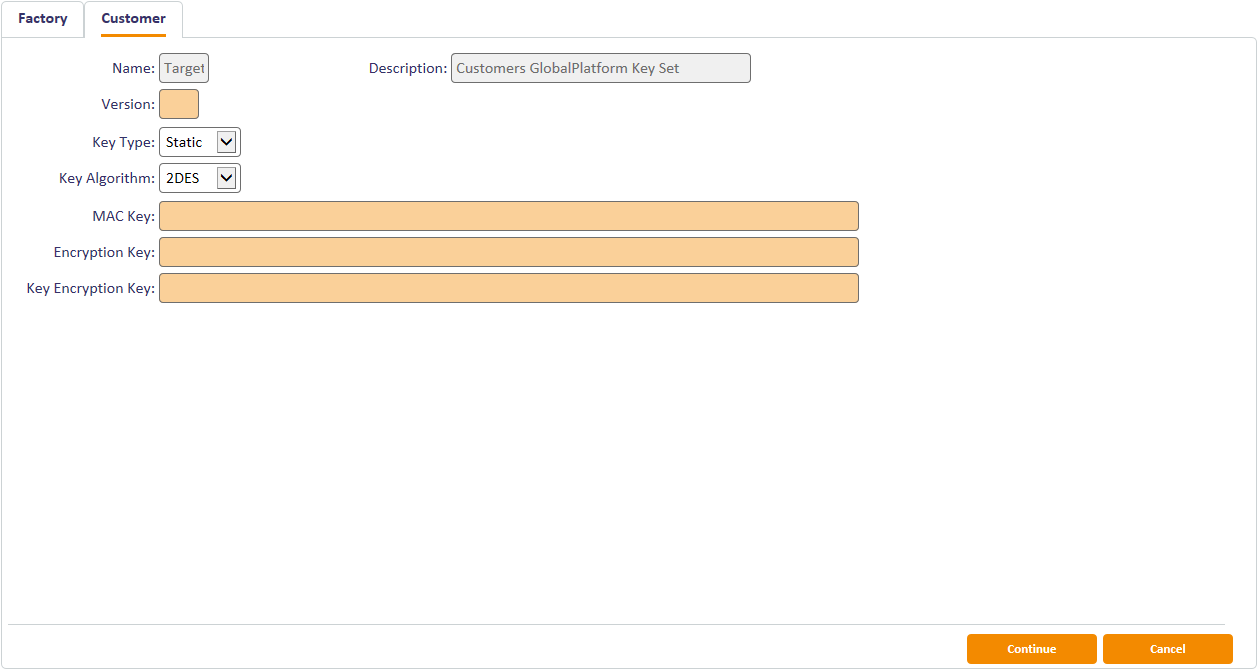
Click the Customer tab.
The Customer page is displayed.

Note: You can define only a single set of local keys at one time per Key Algorithm; for example, if you are using both SCP01 cards and OT-SCP03 cards, you can define one 2DES customer key (for the SCP01 cards), and one AES128 customer key (for the OT-SCP03 cards). Name and Description cannot be changed. You can delete existing keys and enter a new key: cards issued with the previous customer keys will still work, but all cards issued in the future will use the new customer key. See section 7.3.7, Deleting customer (local) keys.
-
Enter the Version of the key set.
This must be a different value from the version entered for the factory keyset. Also, if you have specified a factory keyset version of 255, you cannot use a customer keyset version of 1. The customer key version must be between 1 and 127 and not match the key version of any factory keys that use this algorithm.
For example, if an SCP01/SCP02 card has factory key version 255, and another SCP01/SCP02 card has a factory key version 3, a 2DES customer key can be created with key version 99. This is a number between 1 and 127, which is not 1, not 3 and leaves other lower key versions free for any other SCP01/SCP02 cards to use later.
-
-
Static – the key used is the same throughout.
Static customer keys are not recommended, and cannot be stored on an HSM.
-
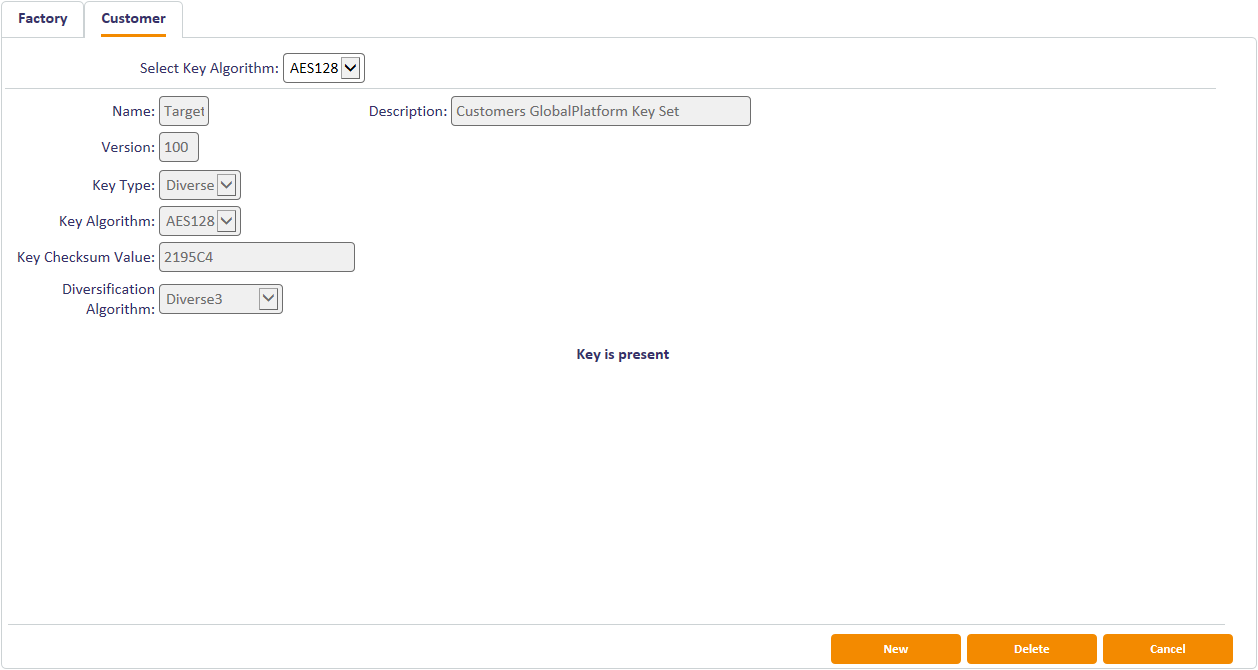
Diverse – the keys use a diversification algorithm.
Different options appear based on your choice of Key Type.
-
-
Select the Key Algorithm to be used for the cards.
For example, for cards that use the SCP01 channel, select 2DES. For cards that use OT-SCP03, select AES128.
-
If you selected Static keys, type the provided MAC Key, Encryption Key and Key Encryption Key values into the fields.
- The MAC Key is the Secure Channel Message Authentication Code Key (S‑MAC).
- The Encryption Key is the Secure Channel Encryption Key (SENC).
- The Key Encryption Key is the Data Encryption Key (DEK).
-
If you selected Diverse keys:
- Select the Diversification Algorithm from the list available.
-
Select one of the following options:
- Automatically Generate Key In Database – this option generates a key in the database to be used for your cards.
- Automatically Generate Key In HSM – this option generates a diversification master key in the HSM, and is the most secure option.
- Master Key – type the key into the Master Key field. Optionally, you can include the KeyChecksum Value.
- HSM Label – type the label of an existing HSM‑resident master key into the HSM Label field.
- Use Key Ceremony – once you click Continue, you enter the parts of the transport key and encrypted master key in a key ceremony. See below.
- Import Keys from File – once you click Continue, you import the key from an XMLenc format file. See below.
Note: For a production system Intercede strongly advises that you use a diversified customer key. This causes a unique key to be calculated for each card.
-
If you are automatically generating a key either in the database or the HSM, using a key ceremony, or importing keys from file, you can specify the attributes of the key. These determine the possible uses of the key.
- Data Encryption Key – the key is used to encrypt data.
- Allow Signing Operations – the key can be used for signing operations.
- Exportable – the key can be exported after it has been imported. See section 7.3.4, Exporting keys for details.
- Key Encryption Key – the key can be used to encrypt keys.
- Allow Derivation – the key can be used to derive individual keys.
- Click Continue.
- If you are using the Use Key Ceremony or Import Keys from File options, you must now provide the keys. See section 7.3.2, Using a key ceremony or section 7.3.3, Importing keys from a file.
7.3.7 Deleting customer (local) keys
You can use the Manage GlobalPlatform Keys workflow to delete a customer key; this allows you to enter a new customer key. Cards issued with the previous customer key will still work, but all cards issued in the future will use the new customer key.
To delete a customer key:
-
From the Applets category, select the Manage GlobalPlatform Keys workflow.
You can also launch this workflow from the Configuration Settings section of the More category in the MyID Operator Client. See the Using Configuration Settings workflows section in the MyID Operator Client guide for details.
-
Click the Customer tab.
The Customer page opens.

If a key is already present, the Delete button is available.
-
If you want to delete the customer key, click Delete.

-
Click Continue to delete the keys.
You can now start the workflow again to enter a new customer key.

7.3.8 Rotating customer keys
You can configure MyID to carry out additional processing whenever a card update (including certificate renewals) is collected to determine whether the GlobalPlatform or PIV 9B keys that are used by the device need to be updated. If either set of keys is out of date, during the collection of the update job MyID applies the latest sets of keys that are applicable to the device.
New issuance, reprovision, and replacement jobs continue to behave as before, swapping out factory keys for customer keys if appropriate customer keys have been configured for the type of device being issued.
To configure this option:
-
From the Configuration category, select Operation Settings.
You can also launch this workflow from the Configuration Settings section of the More category in the MyID Operator Client. See the Using Configuration Settings workflows section in the MyID Operator Client guide for details.
-
Click the Issuance Processes tab.
-
Set the following option:
-
Rotate Keys On Card Update – set this option to Yes to enable the customer key rotation feature.
The default is No – MyID does not rotate the customer keys when carrying out a card update, and operates as previously.
-
-
Click Save changes.
Note: When creating a new version of a customer GlobalPlatform key, you must set the key Version to a value that is not already in use by an existing GlobalPlatform key with the same Key Algorithm. See section 7.3.6, Entering customer (local) keys for details of setting key version numbers.